A Spoon Full of Lovin'

One Scoop of Love at a Time

Let’s Have a Fiesta! Spicy Black Bean Wrap with Guacamole — July 2, 2012

Let’s Have a Fiesta! Spicy Black Bean Wrap with Guacamole

It is officially summertime and that means I begin to crave spicy food and the refreshing taste of sweet farm fresh vegetables. I mean really, what better way to give your tomatoes a kick then to make a delicious salsa? Pair it with a great smooth, garlicky guacamole and ya add some kick with spicy black beans and you have yourself a fiesta for your mouth! At this point in my imagination, Moroccas are shaking and I am on a very nice beach somewhere. Anything I can do to keep this tropical vision alive while eating a good meal makes me one happy gal.

Now, I must admit, I love avocado. I eat one almost every day. They are so smooth and delicious. When you add even the smallest amount of pepper or blend it with anything at all, avocados are transformed into something absolutely magical and delicious. Whether it’s sweet or savory, avocados are a must in my kitchen. It’s making me wonder if I should just run away and work on an avocado farm.  All this to say, that avocados are the base to my favourite Mexican dip: Guacamole.


I was craving Mexican food, and thanks to some generous farmers at a Farmers Market near Nanaimo, BC, I found myself with a free bag of collard greens. I love collard greens, not only because they add a great taste to stir-fry’s, but also because they make a great wrap! I’ve even used them instead of a hamburger bun, and it’s delicious. So I set out to make spicy black beans with fresh salsa and guacamole, all wrapped up in a large collard green leaf. This recipe was very DIY, so feel free to spice it up anyway you want. I definitely recommend the methods of cooking I use, but feel free to experiment with different spices and measurements.

Spicy Black Beans

½ Large Spanish Onion
1 Can Black Beans
1-2 tsp Garam Masala
½-1 tsp Mexican Chili Powder

On medium heat, add olive oil or butter to a frying pan. I always caramelize onions in a pan first, and then when they are sufficiently soaked and beginning to caramelize, I add in the Mexican Chili Powder. In a separate pan, I fry the black beans lightly in a cooking oil of choice and as they begin to mush, I add in the Garam Masala. After a minute or two (or until the powder is soaked into the beans), I put half the bean mixture in a food processor to make them really mushy and add this new bean mush to the black beans sitting on low heat in a pan. I then add the onions to the bean mixture and keep warm on low. Eventually, you add just a bit of salt and pepper and you end up with a delicious black bean mix.

Guacamole

1 Avocado
Lemon Juice (I cut off a quarter of a lemon and squeezed it over the avocado)
1 Garlic Piece (crushed)

Start by mushing one avocado in a bowl using a fork. Add in your crushed garlic and slowly start to squeeze a lemon. I recommend adding in as much lemon juice as you want. Just remember to take it slow…one excited grip on that lemon and you end up with a guacamole that is way too acidic and lemon-y. Aha perhaps keep the fiesta on pause while you make the guacamole.

Salsa

½ Large Tomato
¼ Cup Red Onion
1 Garlic Piece (crushed)
¼ hot pepper
Handful Fresh Cilantro

Chop the tomato and onion into small cubes, or whatever shape you want! Just make sure both are finely chopped as you want all the tomato juice and small chunks of onion, as they are easier to eat. Add in your crushed garlic and hot pepper, giving it a quick stir. Add in the Cilantro (again, I would start out small and add in more cilantro if desired) and you have a great, fresh tasting salsa. Add any other ingredients, like peppers or corn, and don’t be afraid to experiment.


After these few things are made, you place them all on top of a collard green and wrap it up. The salsa will soak up the collard greens and the black beans and avocado create a smooth, delicious taste. Because it is wrapped in greens I always go back for more. I work up quite an appetite shaking my booty to Spanish music and making Mexican food. This is your fiesta, so make it one that will make you scream mucho delicioso!

Kick back and enjoy.

Jessica’s Lemon Birthday Cake with Raspberry Buttercream Icing — June 18, 2012

Jessica’s Lemon Birthday Cake with Raspberry Buttercream Icing

Summer has commenced and all my favourite fruits are lining the fruit bins at the grocery stores, bursting from their crates, alluring me with their bright colours and beautiful textures. So when I volunteered to make my sisters 27th birthday cake in early June I instantly thought that I must take advantage of the ripe fresh raspberries. But because it was my sister’s Birthday I told her that she could have the cake of her choice. I was relieved when she said she wanted something light and lemony, for lemon pairs perfectly with raspberry. And voila Jessica’s Lemon Birthday Cake with Raspberry Buttercream Icing was born or rather re-created from a recipe I found online that seemed utterly scrumptious. The result was visually spectacular but I held my breath for the real test was to come. As people took their first bites their faces lit up and I knew that it was also a flavourful success.

I must warn you though that this cake is not for the fair weather cake eaters of the world. You must not be concerned with your faddy diets being destroyed of the fact that you may have to let out one belt buckle after consuming this cake. What I am trying to say is that you must be prepared to embrace your inner fat kid.

On that note, I must also disclose that this cake was not in any regards light. In fact I would say that it is rather like a lemon – five- pound cake. But every pound of cake was consumed with joy and I would definitely put it in my recipe memory bank for another Birthday or summer occasion.

I adapted this recipe from: http://www.biggirlssmallkitchen.com/2011/10/lemon-birthday-cake-with-raspberry-buttercream.html

 For the cake you will need:
4 large eggs
1 1/3 cups sour cream, divided
2 teaspoons vanilla extract
Zest of 2 lemons
3 1/2 cups flour
2 cups sugar
1 teaspoon baking powder
1 teaspoon baking soda
2 1/2 sticks butter, at soft room temperature

For the icing and decoration:
3 cups fresh raspberries
1 1/3 cups sugar
4 eggs
4 sticks butter, at room temperature

To make the cake layers: Preheat the oven to 350°F. Then grease very veeeeery well with oil or butter two 9-inch spring form cake pans.

You will first want to whisk the eggs with 6 tablespoons of the sour cream, vanilla, and lemon zest.

In a separate bowl mix together the flour, sugar, baking powder and soda. Add the butter, cut into rough tablespoon-sized chunks, and the remaining sour cream, and, using your hand-held mixer beat this together for nearly two minutes until it is very creamy. Then add in the egg mixture in two parts, beating in the mixture well.

Pour the batter into the cake pan and bake for 30 minutes. You will want to do the toothpick test (if it comes out clean you are good to go). If it passes the test run a butter knife along the edges, then remove the sides of the pan and cool completely. When cool, flip the cake onto the plate you wish to serve it on.

To make the icing:

Puree 1 1/2 pints of raspberries with 1/3 cup sugar in a blender –thank god for the magic bullet-. You will save the other 1 ½ of raspberries for decorating the top of the cake. I may have also nibbled on a few while doing so.

Combine the eggs and sugar in a heatproof bowl and set it over a pot of simmering water. Whisk constantly but not too hard, until the egg-sugar mixture is warm. Make sure that you do not end up curdling the mixture.

Remove from the heat and beat on high speed using a mixer. After about 5-7 minutes, it should have increased in volume. It should be light, airy, and cool. Add the butter a few tablespoons at a time. Mix it super duper well because no one likes getting a big buttery mouthful with their lemon cake.  At points, the icing may look curdled but do not fear you just have to give it a good whipping. When all the butter is mixed in, you can then add in the raspberry puree and beat again.

To put together the final creation, place one layer on a serving platter. Spread a thick layer of butter cream across. Carefully place the second layer, top side down, on the buttercream. Use the remaining icing to ice the top and sides thickly and evenly. Arrange the fresh raspberries as you like! And then …OM NOM NOM.

Happy Baking!

-L


Spring is in the air, so let’s make tarts! — April 22, 2012

Spring is in the air, so let’s make tarts!

Can you smell that? It is the sweet smell of spring, that breath of fresh air that we all crave following the dreary, dark months of winter. Drops of dew dangle upon the budding flowers, birds begin to chirp happily outside your window in the wee hours of the morning, tempting your desire to skip out of bed and greet the day with an oh so satisfied grin on your face. If you don’t feel like this when you first wake up, and in fact you despise the very idea, I can at least hope that the one thing you look forward to about spring is the sunshine and the birth of a new gardening season. Fresh tomato and strawberry plants hang from balconies, soaking in the sunshine, slowly blossoming and soon to be eaten. The promise of fresh juicy produce hanging in the air, sweet upon my lips, I decide that I simply cannot wait. With sweet, almost guilty satisfaction, I decide to take matters into my own hands and buy everything I need to celebrate the arrival of spring by making Sweet Mixed Berry Tarts. I knew I would have to buy frozen berries, but a girl simply cannot wait until summer!

Now it may sound silly, but a bag of frozen berries truly is a guilty treat for me. I have so many other guilty pleasures that I indulge in every week, that an average student simply cannot afford to buy all the food riches that we crave. But, the first day of spring only comes around once a year and that deserves to be celebrated, don’t you think? I’ve been trying to make more raw goods lately, as my stomach has so many issues with so many foods that I try to walk a very natural, thin line. Using delicious (and very unexpected) ingredients like Agave Nectar and Cashews, I made some Sweet Mixed Berry Tarts. Adapted from a post by Sweetly Raw http://www.sweetlyraw.com/2010/07/sweet-tooth-summer-berry-tart.html I was very satisfied. I got lazy when melting my coconut oil, so the tarts weren’t as “put together” as desired, but they were delicious. If you’ve never visited Sweetly Raw, and love raw food, you must dedicate a night of clicking endlessly on her many blog posts as they are all so intriguing and seem delicious.

Mixed Berry Tart


1 1/4 Cup of Mixed Frozen Berries

1/2 Cup of Cashews

2 Tblsp Agave Nectar

2 tsp Lemon juice

1 Tblsp Melted Coconut Oil (melt in a small pot submerged in a bigger pot of boiling water)

In a food processor, add in your agave nectar first and then add in the berries, cashews and lemon juice. Blend until smooth and then add in the melted coconut oil. Blend a few quick times again, hoping that by the time it begins to solidify, it has successfully absorbed your tart mixture. When this occurs, it will be a thick mixture, yet it will still need to sit for about an hour in the fridge. So place it in a glass container and place in the fridge. As this sits you can make the crust!

Macadamia Nut Mango Crust

1 Cup of Macadamia Nuts

1/2 Cup of Shredded Coconut

2 Tblsp Finely Chopped Dried Mango

2 Tbsp Agave Nectar

Put everything in a food processor except for the agave nectar. Make sure that the nuts are ground, but not too finely as your risk them becoming too oily instead of sturdy. Add in the agave nectar to your mixture and blend a few times. This allows your mixture to become sticky, so make sure that all ingredients are stuck well together when you pick it up in your hand. I used a muffin pan and lined it with the crust mixture. When this is done, you can place the muffin tray in the fridge for about an hour or two so that the tart crust hardens.

Now the waiting period can sometimes be full of joy itself and not hateful anticipation. Allow yourself to indulge, as there are just some moments in life that deserve to be sweet with no regrets or strings attached. If you’re anything like me, you will take this time to eat the entire bag of the frozen berries..yummm. Or perhaps you’ll place the frozen berries in some white wine and forget all about your tarts. Either way, enjoy the sweet taste of a Mixed Berry Tart and crack a smile, because spring has officially sprung.

Slutty Brownies — March 28, 2012

Slutty Brownies

Slutty Brownies

I have an addiction. Admitting that you have a problem….that is step one in the process of curing yourself right?   But what if I don’t want to fix that problem? What if all I want to do is make chocolate treats, indulge and call it day?  Ok, so maybe I have a slight problem.  However because bikini season is not ….tomorrow, I just don’t think I can justify being cut off from my favourite treat. Perhaps just another couple of weeks and then I will address the issue again.

When I came across this “recipe” about a month ago, I just couldn’t ignore it. Now after testing it out myself, just to ensure its user safety, I present to you one of the most decadent indulgent treats I have ever made. Drum roll please… SLUTTY BROWNIES! The Londoner –http://www.thelondoner.me/2011/06/slutty-brownies.html-  came up with these bad boys and they are so very good. So quick, so easy and so irresistible.

Now you better read closely because the recipe is a really tough one to follow. Just kidding… these are called Slutty Brownies for a reason people.

You will need:

One box of Brownie Mix (any kind works, but when in doubt go for Betty Crocker… she makes a mean packaged brownie)

One box of Oreo’s

One box of Chocolate Chip cookie dough mix   (I used Quaker …. they are my favourite!)

Also don’t forget that you will need eggs (probably 2 to 3) and olive oil (probably a couple table spoons) for making these as designated by your packages instructions.

Now that we are ready to make some magic happen, put on your prettiest apron and invite over your girlfriends. While you are waiting for everyone to arrive here is what you are going to do:

1)      Heat your oven to 350 Degrees

2)      Put parchment paper in your brownie pan

3)      Make up your cookie dough as designated by the box and then cover the bottom of your brownie pan with it. Make sure to spread it equally and into the corners as well.

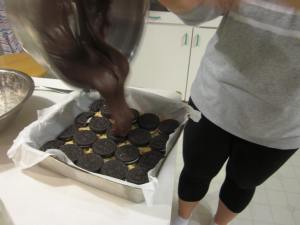
4)      Then cover the cookie dough with a layer of Oreo’s

5)      Then make your brownie mix as the box requires you to and pour that over the Oreo’s and cookie dough.

6)      Pop them in the over for 30 to 35 minutes

And voila! Slutty Brownies are ready to serve after you let them cool for about five minutes. Be careful, they are addictive. I suggest you give them away quickly before you eat them all!

-L

Zucchini Latkes — March 26, 2012

Zucchini Latkes

Zucchini  Latkes

I had the most wonderful and relaxing weekend hanging out with wonderful friends, watching great movies, sleeping in late and making delicious food. I am only one hour into my Monday and I am already missing the weekend. It felt like a taste of summer.  Summer is by far my favourite of all the seasons with its warm evenings, BBQ patio parties and beach fires. Summer food in my opinion is the best; with an abundant selection on fresh fruits and veggies accompanied by cold refreshing beverages.

This Friday while scoping out one of my favourite bloggers, I saw that she posted the most marvellous sounding recipe for Zucchini Fritters a.k.a Zucchini Latkes –http://www.thelondoner.me/2012/03/courgette-fritters.html–  which were inspired by her trip to the beautiful Greek Islands and decided that I must give them a try. So on Saturday evening, when all was calm and the sun was shining I rolled up my sleeves turned on some good tunes and went to work whipping up this delicious recipe. It did not take very long at all to make these little gems and they were so delicious. I can see myself making them again in the not so far future for sure. You should give this recipe a try. I guarantee you will not be sorry. Super easy, super delicious and a taste of summer.

Zucchini Latkes

Ingredients:
1 coarsely grated zucchini (about 2 cups)
1 cup coarsely grated potato (uncooked and unpeeled)
Salt and pepper
2 eggs
2tbsp chopped chives
2tbsp chopped mint( I could not find fresh mint so I used dried mint)
zest of one lemon

Once you’ve grated your veggies, you will have to  leave them to dry for while. So just throw them in a strainer sprinkle with salt and leave for 20 minutes while you make your dip for the Latkes.

Yogurt Dip adds a little extra something to these Latkes and gives you an excuse to eat them with your hands. I adapted the dip from The Londoner’s blog as well because I wanted a little less dip than she made.

Yogurt Dip

You Need:

½ cup 2% plain yogurt

A wedge of lemon juice

2 cloves of garlic chopped finely

1 teaspoon finely chopped chives

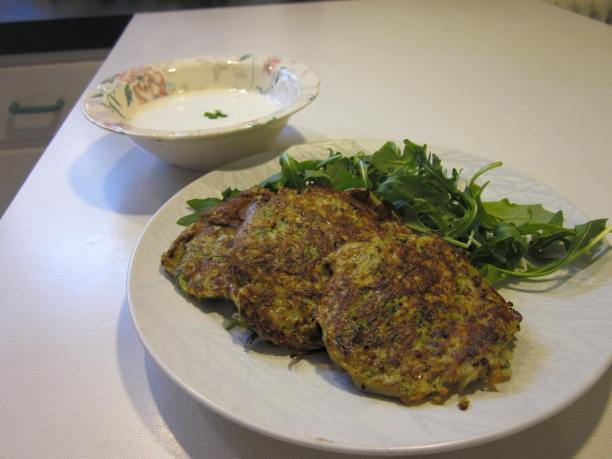
Now back to the veggies! Press all the water that you can out of them while they are in the strainer and then add them to a bog bowl that has your eggs, lemon zest, chives and mint already mixed. Mix well and then turn on your element to between medium and high heat. Put some oil in a pan and let it heat up. Once it does spoon out mixture into hamburger pattie sized rounds and let cook on each side for about 2 to 3 minutes until they are nice and golden brown. Turn oven on to 200 degrees so that you can throw them in there to stay warm while you cook the rest.

Enjoy!

-L

Its Coco-Nuts! Chocolate Coconut Flour Brownies — March 19, 2012

Its Coco-Nuts! Chocolate Coconut Flour Brownies

Sometimes I can be found wandering up and down the grocery store aisles, picking things up, shaking them, tasting them or even smelling them. In fact, I do all of the above a little too often. Everyone needs a hobby right? Well one day, I stumbled upon this wonderful flour that smelled absolutely sweet and delicious. I couldn’t believe that I had never even heard of it before..especially since I am always on the hunt for grain free flours. But, alas, I found my one true love, and boy it is sweet. Coconut flour has to be some of the finest and most delicious of flours I have ever tasted. I was a little nervous at first, taking a chance on something that was playing it way too smoothly. But, in the end, the aroma got to my head and I left the grocery store with the bag of coconut flour in hand.

As you can probably guess, I was a little too excited to have a new baking adventure to embark on. I had to search for a recipe that would be just right, and then gather up the rest of my usual baking gear. Apron on, spatula in hand, I found a recipe that fed my endless crave for brownies. Taken from aspoonfulofsugarfree, this recipe turned out to be the most delicious fudge brownie creation as it was perfectly moist and decadent. Afraid that I may be overdoing the chocolate, I also decided to finally try to make a cashew vanilla icing. Soaking cashews and then mixing them up is a healthier way of creating icing that I learned about long ago, but am always too anxious to wait for something to soak for two hours. Satisfied that I would need sufficient cooling time for the brownies, I soaked the cashews and bought some fresh Vanilla Bean for an extra taste of something sweet.

Coconut Flour Brownies

1/2 Cup Coconut flour

1/2 Cup Cocoa

1 tsp Baking Powder

2 Eggs

5 Dates

1/2 tsp Vanilla Bean

1/3 Cup Almond Milk

1/2 Cup Dark Chocolate shavings

Set the oven to 375. In a medium bowl mix together the coconut flour, cocoa, baking powder and chocolate. Set aside. In a food processor, mix the dates at high speed. Add in the mixed dates and the wet ingredients to the medium bowl of dry ingredients. Mush around really well with a big spoon or just use your hands. Grease a deep baking dish with coconut oil and then smooth out the mixture. Bake for 15-20 minutes, or until toothpick comes out clean 🙂

Vanilla Cashew Icing 

1 1/2 Cups Raw Cashews

1/2 Cup Water

2 Tblsp Agave Nectar

3 Tblsp Coconut Oil

1 Tblsp Vanilla

Allow cashews to soak in a bowl for 2 hours (at least). Empty water and then put all ingredients in a food processor. Mix well and refrigerate.

Once the icing has a smooth yet sturdy consistency, spread it thickly over the brownies. Honestly, both parts of this brownie are equally as good. I think I ended up with half cashew icing half brownie when I looked at them from the side. They were sooo good, especially after being in the fridge overnight. There’s something about a cold fudge-y brownie that makes me smile..yuummmm it was good.

If you are anything like me, you will eat one…pick at another one…have a glass of milk and continue this process until the container is empty. Whether this happens in one day or one week, savor that smooth chocolate taste and go ahead skipping throughout the day. Be careful though, these may just make you burst with joy.

Hot Off the Grill: Roasted Garlic and Basil Naan Bread — March 9, 2012

Hot Off the Grill: Roasted Garlic and Basil Naan Bread

Don’t ask me why, but every time I crave bread I daydream about how wonderful it would be if I made it all on my own. Now, most students my age would just follow their dreams and toss that dough in the air! Don’t lie, I know every time you picture yourself making bread, you are also throwing the dough in the air and dancing in a whirlwind of flour. Needless to say, I always shied away from this adventure. Could my arms withstand the pressure? Would I ever get the flour out of my hair? There were just too many tragic possibilities to this daring task.

Then, February Break arrived. That beautiful time of year which every student fully embraces, smiling excitedly and laughing at the pure joy of finally having some well needed snooze time. In my hysterical state of happiness, I was fearless. Heck, why not make some homemade Naan bread to go with my hummus?! I was unstoppable…mostly because after cooking with so much garlic no one would dare approach you, but still! Left to my own desires, I not only kneaded that dough and threw some flour around the kitchen, but I smothered it with fresh basil and watched as it slowly rose in the pan. It was lovely..and best of all, it tasted so delicious. I promise, this recipe only took 10 minutes of preparation and then 10 minutes to cook! It was so easy, and it tasted to heavenly, it is a must have every time you make (aha okay…let’s be honest…) or buy a dip you must whip these up! GO ahead yall, raise those arms and get out the rolling pin, cause it’s your turn to roll some dough.

I took this recipe from Tracey’s Culinary Adventures but adapted it slightly according to my eating and tasting needs. (http://traceysculinaryadventures.blogspot.com/2011/02/homemade-naan.html). Remember, you can adapt any of these recipes as well, just stick to the basics and then follow your intuition.

Roasted Garlic and Basil Naan

2 Cups of Whole Wheat Flour

3/4 tsp Baking Powder

1/2 tsp Baking Soda

1/2 tsp Brown Sugar

1/4 tsp Salt

1/2 Cup Warmed 2 % or Unpasteurized Milk

1/2 Cup Natural Yogurt

3 Tbl Olive Oil

2-3 Cloves of Garlic

1 Handful Basil

In a Medium bowl mix together whole wheat flour, baking powder, baking soda, brown sugar and salt. Mix this dry mixture around a little bit. In a separate measuring cup, warm 1/2 Cup of Milk either on the stove or in the microwave. Once warmed, add in the natural yogurt. Stir this wet mixture fast and wait until it creates a thick, delicious mixture. Add it to your medium bowl of dry ingredients. Make sure to pick up all the nooks and crannies of that pesky flour, as it has the tendency to cling to the bottom rims of the bowl. Form the dough into one big ball and then leave it placed in your bowl. Moisten a dish towel and put it over your bowl. Allow this to sit, covered, at room temperature for 2 hours. While this sits, in a cup mix together the oil and garlic.

Once your mixture has sat, roll out your dough. I thought about 2 cm was good in thickness, but the dough puffed up immediately in the pan. Although this made the naan delicious, smooth and perfectly moist, it may be too much naan for some to handle. If this is the case, don’t be scared to roll this dough out as thin as desired, as it will rise in the pan. You want to cut out whatever shape, and then moisten one side with water, putting the moist side down on the heated pan. On the top side, smooth out your olive oil and sprinkle on the basil. Cook on medium heat until it has browned on the bottom (this took about 5 minutes). Flip and wait until brown.

Luckily, I got to share the fresh, warm joy of pulling apart this bread with some friends fresh off the pan. Enjoy this garlicky smooth treat with a glass of wine, and go ahead, laugh at your triumph! You have now conquered the bread world, and there’s no turning back. Throw your arms back and enjoy.

M


Pain au Chocolat — March 2, 2012

Pain au Chocolat

Since my love for baking began I have always looked with awe upon those who can make a perfect pastry. I go gaga for all kinds of pastry, both savoury and sweet. However I must say that there is something so perfectly divine about beautifully crisp soft layers of golden pasty surrounding melted chocolate. In full disclosure I have made some pretty darn good chocolate croissants in the past from  pre-made pastry mix but this time I didn’t want to fake it. I wanted the real deal. Thus this past week I decided that I was going to take the time and give pastry making a whirl! So on a calm Wednesday eve I set about in Meg and I’s small little kitchen, to make one of my favourite beyond favourite treats: pain au chocolat. Even the name makes me smile for really what is there better in life than bread and chocolate together… very few things I do say. I borrowed this recipe from the cooking blog “Baking With Julie” (http://dinnerwithjulie.com/2010/02/06/pain-au-chocolat/). I am not going to lie, as I stuck my first tester batch in the oven I may have paced the house in anticipation, waiting to see if my efforts were to pay off or be a complete flop. However my pain au chocolat proved to be a success.

 What you will Need:

Dough:
3/4 cup milk, warmed up a little bit
1 Tbsp. active dry yeast
1/3 cup sugar
2 large eggs
1 tsp. vanilla
3 1/4 cups all-purpose flour
1 cup (1/2 lb.) butter, cold
1/4 cup all-purpose flour
Filling:

3/4 cup chocolate chips or any kind of chocolate your heart desires

Directions:

In a large bowl, whisk together the milk and yeast. Then stir in the sugar, eggs and vanilla.  Add one cup of the flour to start and  then add the rest of the flour slowly. Stir until flour is fully incorporated. Then knead the dough on a lightly floured counter until it is nice and smooth. Transfer to a lightly floured baking sheet and cover with plastic wrap; chill in the refrigerator for 30 minutes.

Then while the dough is set aside beat the butter and flour with an electric mixer for a couple minutes. Set aside but don’t refrigerate!

When the dough has chilled, turn it out onto a  floured surface and roll into a rectangle that is about 13″x18″ and 1/4″ thick. Then great ready to butter! Spread the butter evenly over the right two-thirds of the dough. Fold the left third of the dough over, covering half the butter, then fold the right side over, as if you were folding a letter in thirds. Cover the dough in plastic wrap and put it back into the fridge for 30 minutes. Repeat this step 3 times after this so that you have folded it like an envelope for a total of four times with 30 minute refrigeration in between each time. Once you are done this and your arms are feeling a bit weak -because trust me mine were you cover and refrigerate for at least 3 hours, or overnight.

To create the pain au chocolat, take the dough out of the fridge and roll it on a lightly floured surface to about 1/4″ thick. You can cut the dough into rectangles as large or as small as you like. I made them about the size of a business card as instructed by Julie’s blog.  Put a little (or big) pile of chocolate chips along one of the sides of the pastry and then roll the pastry so that you can see chocolate chips peaking out on wither side. Then place each pastry down on an ungreased baking sheet and ta-DA they are ready to bake or to freeze for later!

So the moral of this baking adventure is that if I can make delicious pastry then you can too! I must note that you can also put savoury delights in this pastry and have it be equally tasty. Next time I am going to use goat’s cheese and cranberries.

Note: I made the dough a day in advance and then the next day left it out an hour to thaw before rolling out the pain au chocolat. Also after I made them, I did not bake them all at once. I instead froze the twelve I had left over and then pulled them out later that week to bake for guests.

Happy Baking !

-L

Curried Cabbage — February 18, 2012

Curried Cabbage

Every year, about half way through the winter season, I find myself re-embracing those tough root vegetables. They are truly wonderful, as you can always rely on them to fill your belly. Although, I always seem to reach a point where my cheeks are so rosy and my pants are so tight that I either become overwhelmed by uncomfortable laughter, or I simply give in to the  tugging urge of sleep. Dinners in the winter time are a magical thing, as they spread a calming warmth throughout your body right from the first bite.

Although I absolutely love stews, and I promise I will get around to making my own chicken pot pie, (mmm homemade buttery crust…my mouth quivers.. i could never say bye to butter) oddly enough this weekend I found myself picking up a cabbage. It’s delicate leafy folds were deceiving as I trucked this heavy vegetable all the way up the hill, only to have it break my bag on the way home. That’s right, we had a full out cabbage toss on our hands right in the middle of traffic. Luckily mid-morning Halifax never seems too grumpy, so I made it home safely with cabbage in hand.

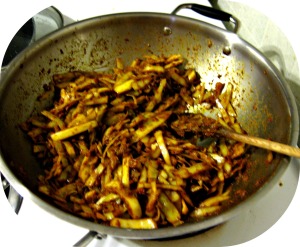
I couldn’t wait to make some sort of soft, spicy mash. I know that doesn’t sound too appealing, but food that is both spicy and mushy is absolutely delicious. The great thing about cabbage is, you can boil half to make it soft and then add some raw half way through to add some crunch to your recipe. Usually I adapt a recipe from a website, but this was one homemade mush that didn’t need any instructions. I let those spicy instincts free, and while listening to some jesse cook, I threw powders, peppers and masalas into the wok. The best part for me is always at the end. Not only do you have steaming food in a very large pan, but you get to lick the wooden spoon. Wooden spoons are essential for every recipe endeavor, whether it be for baking or cooking, you always want to lick the wooden spoon. This recipe was great for creating smooth onion clusters that were loaded with spice, right at the edges of the spoon, and I gladly allowed myself to eat them all.

Curried Cabbage

Half a cabbage, steamed and then thrown into the wok

One white onion

1/2 cup lentils

1 Tbl Curry Powder

2 Tbl Chili Powder

1 tsp Turmeric

1 tsp Coriander Seed

1 1/2 tsp Cumin

2-3 tsp Soy Sauce

Saute the onion on medium heat. Add in the curry powder. Allow this to simmer for about 2 minutes, then add in your cabbage. Slowly add the rest of your ingredients, and make sure to throw as much spice in there as you want! This recipe is a guideline. Just remember, you can never go wrong with adding more chili powder.

More than your average curry in a hurry, I eventually added more chili powder and soy sauce.

Usually I call for a glass of one right about now, but this week was filled with such ordinary household events that it was all the comfort I needed. Chatting with mom on the phone and laughing with Connor and Lexi, this small yet beautiful moment was the perfect ending to a sunday night at our small cedar residence.

Red Pepper Hummus and Spicy Baked Eggplant Chips — January 7, 2012

Red Pepper Hummus and Spicy Baked Eggplant Chips

For the last week I have had an intense craving for hummus. I think that hummus is the most delicious dip ever created, as it is a mixture of all of my favourite ingredients, and it is such a sly, smooth devil. I decided to add some kick to this hummus by mixing in a bit of cumin and 3/4 of a fresh red pepper. I always overload on the garlic so I have kept this recipe tame, but I added in another garlic bulb to what is listed below, and it was delicious.

I have always enjoyed the deep color and taste of red peppers. I cannot explain it, but red peppers make me feel a little daring, as if I’m adding some sinful spice to my dish. I think I may be the only one to have such emotions and reactions associated with vegetables, but I have come to see it as a positive thing, as red peppers usually inspire me to listen to some spanish guitar and dance as I cook. Needless to say, this red pepper hummus was not only simple to make, but it definitely spiced up my evening. Alongside some  eggplant chips coated in paprika, it was one of the most delicious late night snacks I have ever devoured. I dare you to try this one!

Red Pepper Hummus

1 19 oz. can of Chickpeas

3/4 medium Red Pepper

4 Tblsp. Tahini

4 Squirts Lemon

3-4 cloves of Garlic

1/2 tsp cayenne

1/2 tsp cumin

2 Tblsp. Olive Oil

Crush the bulbs of garlic. Then proceed to mix all the ingredients together in a food processor, including the already crushed garlic. And voila!

Baked Eggplant Chips 

1 Eggplant (cut into thin circular shapes; not too thick)

Olive Oil

Paprika

Dash Sea Salt

Set your oven to 400 F. Place parchment paper on a baking sheet and place the eggplant circles on the parchment paper. Drizzle olive oil and as much paprika as you want. Sprinkle with a touch of sea salt and throw them in the oven for 10 minutes. Flip them over and put them back in for another 5 minutes or until brown and slightly crispy.

Now, it is important to keep that spanish music playing as you grab a glass of white wine and enjoy this amazing creation that you have just slaved over. Put your feet up, and enjoy 🙂